

I’ve been reading a few books lately about the Danish concept of Hygge and creating a mood of coziness really speaks to my soul. Every winter, I just want to hole up in a pair of fleece pants and make baked goods. While I often gravitate towards desserts, I also regularly make more practical things, like bread.
Now, this bread is time tested. I’ve been making it for years. It’s also the perfect gift for ANY occasion. Hostess gift, new baby, death in the family – it does it all. In fact, I’m pretty sure it may be the secret to world peace. I once gave a loaf to a mom from our school after she’d had a baby. A short while later, I sent an email in my role as room parent to all the parents in our kids’ class soliciting help for a teacher appreciation gift. This new mom and her husband were on the email list and apparently have very different opinions than I do on things like education funding which was made very clear to me in the heated email response I received from the husband. BUT, towards the end of the email his tone cooled and he said, “You do make really good bread though, so perhaps I’ll think about contributing to your project.” In a world where politics are so heated and deeply divisive, I call that a big win. Next, I’m taking the bread to congress.
Whole wheat bread at altitude can be tricky and I spent years making dense loaves that were just okay. I had success making loaves that were partially whole wheat, but every time I would make a 100% whole wheat loaf it would be somewhat brick-like. Early on in my research, I read that many people used vital wheat gluten to make their bread more fluffy and sandwich-like. For some reason, this felt like cheating and I was bound and determined to figure out a way to make the bread without it. I’m here to save you my pain and tell you, it’s not cheating. If you want bread with a light springiness that rivals white bread, just use the vital wheat gluten. (Vital wheat gluten can be found at most grocery stores. My local Kroger store carries it on the baking aisle ironically in the gluten free flour section.) I feel like a lot of people avoid bread because it’s intimidating. Don’t be intimidated. Bread needs a certain level of precision, but not a lot of skill. If you have an instant read thermometer you should be just fine. Currently, I make my bread with freshly ground flour from wheat berries I buy in bulk. You can also use flour you buy at the store, just try the lower range for the flour measurements to begin with since the flour has had more time to settle.
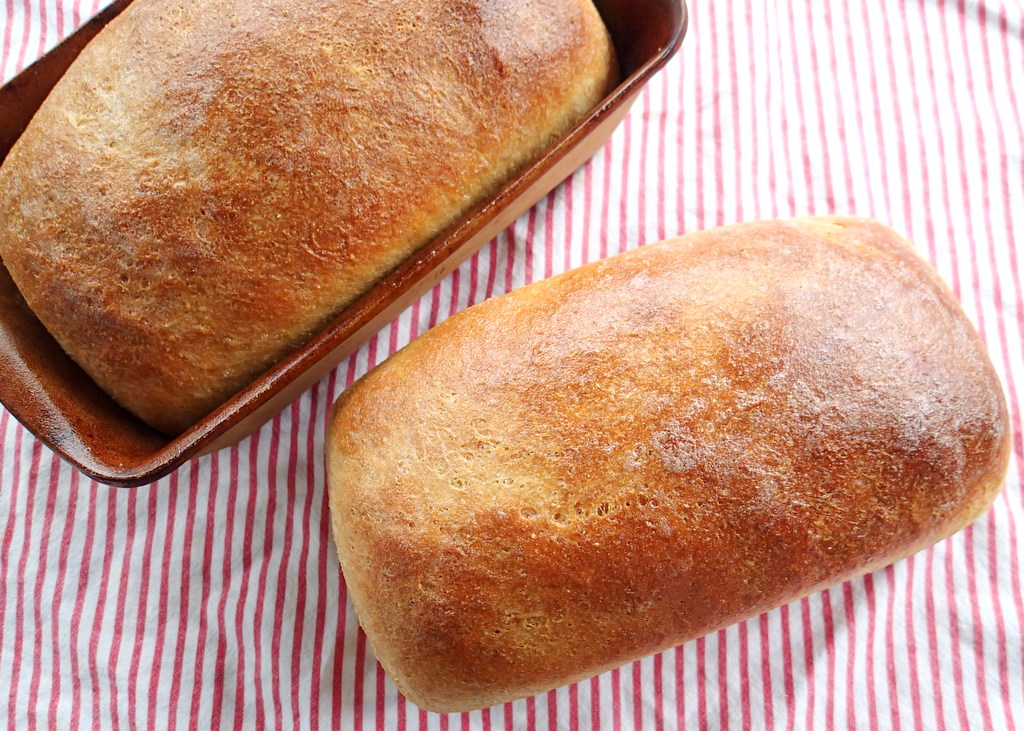
High Altitude Whole Wheat Bread
Ingredients
Sponge
- 2 1/4 tsp dry active yeast or 4 tsp fast rising
- 3/ 4 C Warm water Water should be between 105-115° F
- 2 TBSP honey
Dough
- 2 C warm water or whey
- 5-7 C wheat flour white wheat flour will produce a slightly more fluffy loaf
- 1/2 C vital wheat gluten
- 1 TBSP salt
- 1/4 C olive oil
- 1/3 C honey
- butter optional
Instructions
Sponge
- Temperature is very important when it comes to sponge. If your water is too hot you will kill your yeast and your bread won't rise. If the water is too cold the yeast won't activate and your bread won't rise. I don't tell you that to scare you off, but to let you know that this is not the part of the recipe where you want to cut corners. I have been known to cut corners and I learned my lesson with bread the hard way. Now, I religiously use a thermometer and my bread consistently turns out.
- Heat your water to between 105-115° F. I heat mine in the microwave, but you can heat yours however you want. If the temperature is greater than 115° let it sit on the counter until it cools to the appropriate range. (Technically the yeast could survive to 119,° so take comfort in knowing you have a buffer.)
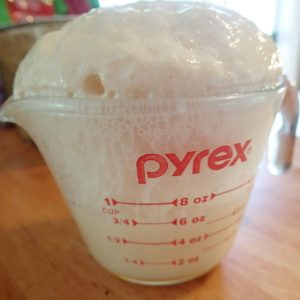
- Sprinkle the yeast across the surface of the water, then add the honey. Stir till mixed. Cover with a light towel and allow to sit until the mixture is bubbly, about 20-30 minutes. I use a 1 C liquid measuring cup, once the bubbles have reached the top I know it's ready.
Dough
- Pour the sponge into a bowl. I use the bowl from my stand mixer. Add the 2 cups warm water or whey (This water temperature isn't as crucial. Lukewarm is fine), 2 cups of the flour, vital wheat gluten, salt, oil, and honey. (Tip: measure the oil in a measuring cup, then use the same measuring cup to measure the honey.) Mix until well combined - you can do this with a spoon or the paddle attachment on a stand mixer.
- Gradually add the rest of the flour in 1/2-1 C portions until the dough forms a ball and no longer sticks to the sides of the bowl. (If you are using freshly ground flour, I find I use more flour because it is so fluffy.)
- Switch to a dough hook if using a stand mixer or turn the dough out onto a lightly floured surface. Knead the dough until the dough is smooth and elastic. (About 5-8 minutes with a stand mixer or 9-10 minutes by hand.)
- Put the dough into a lightly oiled bowl and cover with a light towel. (I pull the dough out and drizzle a bit of oil into the bottom of my bowl. I then put the dough back in, turning it over once to oil both sides.) Put in a warm location and allow to rise until nearly doubled in size or until when you poke the dough gently with your finger the dough doesn't spring back. (Rising will take anywhere from 1-2 hours depending on the temperature.)
- Deflate the dough by punching it down. Divide into two equal parts and gently shape into a loaf. Put the loaves seam side down into two greased bread pans. Cover with a towel and rise a second time.
- Preheat your oven to 375° F 30 minutes after the bread starts its second rise. (I like to set the loaves on top of the oven because the heat will help them rise.)
- Once the loaves have risen to 1.5 to 2 times their initial size, put them in the oven. Bake for 25 minutes. If you want a soft, buttered top, remove the loaves from the oven and slather with butter. (I just grab a stick of butter and rub it across the top.) Return to the oven and bake an additional 3-7 minutes until the top is golden. (If you don't trust your instincts, you can stick an instant read thermometer into the loaf. When the internal temp reaches 180-190° F it's done.)
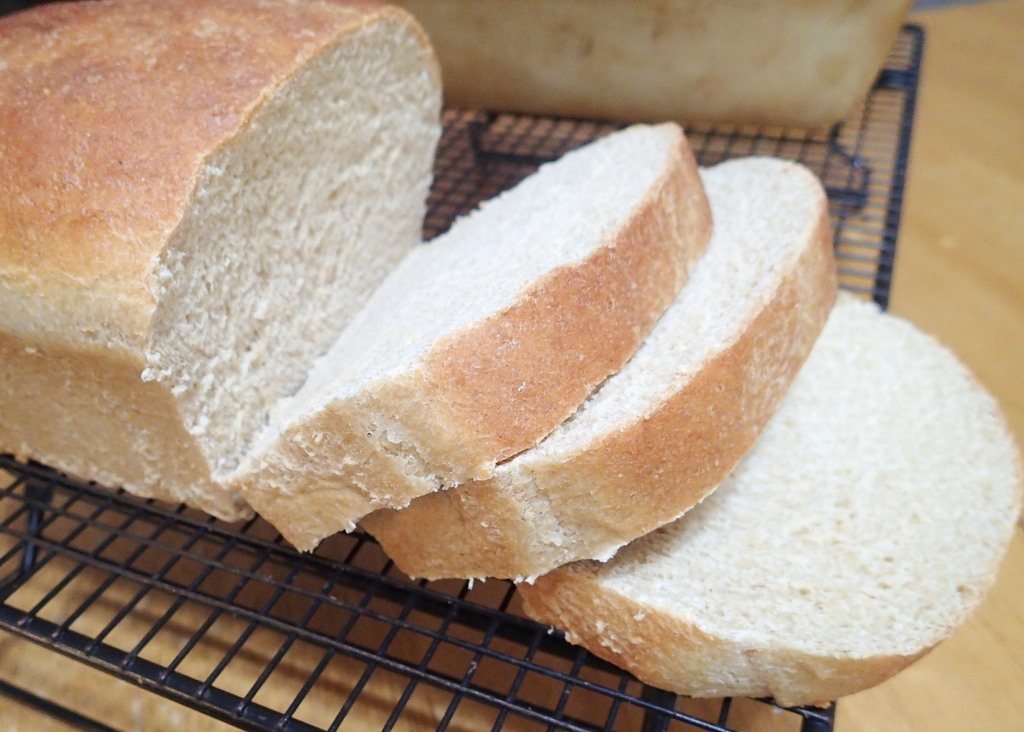
- Let the bread cool in the pans on a rack for about 20 minutes then turn them out to cool more(or eat!).


How would I alter this recipe if I only have instant yeast?
You’d use 25% less yeast, so 1 3/4 teaspoons instant yeast. There’s also no need to proof the yeast; just add the sponge ingredients to your bowl and move on to the dough section. Hope that helps!
I suck at bread making, but your recipe is full proof and I will only use this recipe from now on!!! Thank you
So glad to hear it!
What size bread pans do you use?
A standard loaf pan.
OMG…..I finally got my bread to look, bake and taste like bread after following your recipe AND directions. I live at 7,000 feet and my bread always turned out like BRICKS. I was so happy when this bread turned out beautifully I almost cried. I wish I could send you my pics.
Thank you thank you thank you ❤️